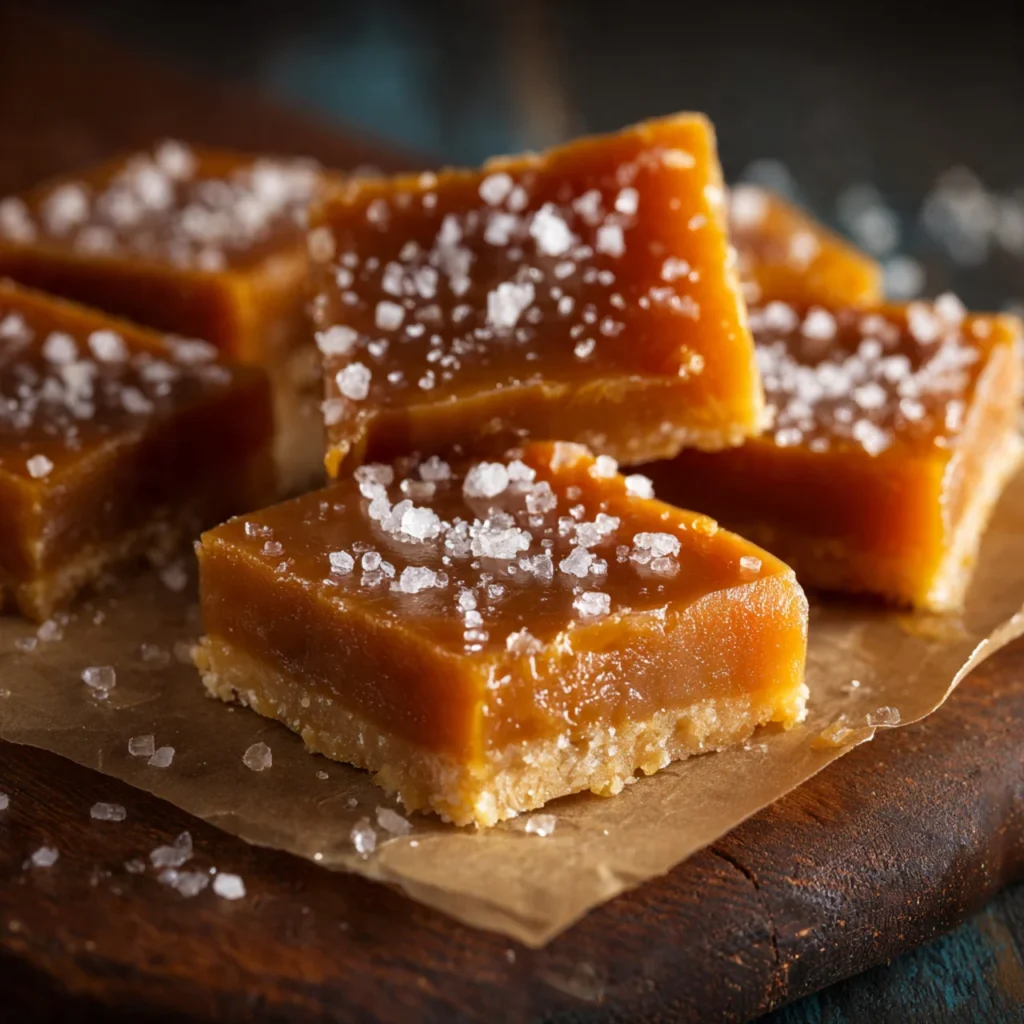
Salted caramels are soft, chewy candies made from cooked sugar, butter, and cream, finished with flaky sea salt.
The contrast between rich sweetness and light salt creates a balanced, buttery candy that’s smooth, indulgent, and hard to stop eating.

Why Salted Caramels Are So Addictive
There’s actual food science behind why salted caramels are so hard to resist.
Sweetness alone can feel flat. Salt alone can be harsh. But together, they amplify each other. Salt sharpens sweetness, balances richness, and keeps caramel from tasting cloying. Add butter and cream, and you get something that feels rich but never overwhelming.
Direct opinion: salted caramels are one of the few candies that truly feel grown-up without losing their comfort-food soul.
Flavor and Texture You Should Expect
A perfect salted caramel should be:
- Soft and chewy, not hard or grainy
- Deeply buttery, not just sugary
- Sweet with a slight bitterness, from cooked sugar
- Finished with a clean salt crunch, not overly salty
If your caramel tastes one-dimensional or gritty, the issue is usually heat control or stirring-not ingredients.
Ingredient Insights (No Measurements)
Sugar
White granulated sugar is the base. As it melts and cooks, it develops those signature caramel notes. Cooking it too lightly gives bland sweetness; too dark makes it bitter.
Butter
Butter adds richness and softness. Unsalted butter is best so you can control the salt level later.
Cream
Heavy cream gives caramels their chew. Lower-fat dairy can cause separation or a rubbery texture.
Salt
Flaky sea salt is ideal for finishing. It dissolves slightly on the surface while still giving a gentle crunch.
Vanilla
Vanilla rounds everything out and softens the sharp edges of cooked sugar.
Understanding Caramel Before You Start
Making caramels isn’t hard-but it is precise. Knowing what’s happening helps avoid frustration.
Caramel forms when sugar is heated until it melts and browns. Adding cream and butter stops the cooking and creates a smooth sauce that firms up as it cools. Temperature matters because caramel continues to change even after it leaves the heat.
Candy thermometers aren’t optional here-they’re the difference between success and mystery.
Step-by-Step: How Salted Caramels Come Together
Step 1: Prepare the Pan
Line a baking dish with parchment paper and lightly grease it. This step matters more than you think-sticky caramel waits for no one.
Step 2: Melt the Sugar
Heat sugar slowly until it liquefies and turns amber. Don’t rush this. Stir gently if needed, but let heat do most of the work.
This is the moment where patience pays off.
Step 3: Add Butter
Once the sugar reaches a deep amber color, add butter. The mixture will bubble aggressively-this is normal. Stir carefully until smooth.
Step 4: Pour in the Cream
Warm cream is added slowly, and again, expect bubbling. Stir continuously until everything is fully incorporated and glossy.
Step 5: Cook to Temperature
Continue cooking until the caramel reaches the proper temperature for soft, chewy candies. This step determines texture-too low and they won’t set, too high and they’ll be tough.
Step 6: Finish and Pour
Remove from heat, stir in vanilla and salt, then pour into the prepared pan. Smooth the top and sprinkle with flaky salt.
Let the caramels cool completely before cutting. Rushing this step ruins texture.
Common Mistakes (And How to Avoid Them)
- Crystallized sugar: caused by stirring too early or stray sugar crystals
- Burnt caramel: heat was too high or unattended
- Grainy texture: cream added too cold or uneven mixing
- Too soft: caramel didn’t reach proper temperature
- Too hard: caramel cooked too long
Direct opinion: most caramel “failures” are just temperature issues-not actual disasters.
Cutting and Wrapping Caramels
Once fully cooled, lift the slab from the pan and cut into squares using a sharp knife lightly greased with oil. For clean edges, wipe the knife between cuts.
Wrapping isn’t just for looks-it keeps caramels from sticking together. Wax paper or parchment twisted at the ends works beautifully and adds a nostalgic touch.
How to Store Salted Caramels
Homemade caramels store better than most people expect.
- Keep at room temperature in an airtight container
- Separate layers with parchment paper
- Store for up to 2 weeks
Avoid refrigeration-it makes them sweaty and hard.
Nutrition (Per Caramel)
| Nutrient | Amount |
| Calories | 85 kcal |
| Fat | 5 g |
| Saturated Fat | 3 g |
| Carbohydrates | 10 g |
| Sugar | 9 g |
| Protein | 1 g |
| Sodium | 55 mg |
Variations You Can Try
Chocolate-Dipped Salted Caramels
Dip chilled caramels in melted chocolate and finish with sea salt.
Vanilla Bean Caramels
Use real vanilla bean for deeper flavor and visual appeal.
Espresso Caramels
Add espresso powder for a subtle bitterness that pairs beautifully with sweetness.
Bourbon Salted Caramels
A small splash of bourbon adds warmth and complexity.
Why Homemade Caramels Beat Store-Bought
Store-bought caramels are convenient, but homemade versions have:
- Cleaner flavor
- Better texture
- Customizable salt levels
- No preservatives
Plus, there’s something deeply satisfying about making candy from scratch-it feels like a small victory.
Gifting Salted Caramels
Salted caramels make incredible gifts. They’re:
- Easy to portion
- Shelf-stable
- Universally loved
- Beautiful when wrapped
Add a handwritten label and suddenly you’ve created something that feels thoughtful and personal.
FAQs
Are salted caramels hard to make?
They require attention, not advanced skills. Precision matters more than experience.
Do I need a candy thermometer?
Yes. Guessing leads to inconsistent texture.
Why did my caramel crystallize?
Sugar crystals formed early-usually from stirring too soon or splashing water.
Can I double the recipe?
It’s better to make multiple batches than one large batch for even cooking.
Are salted caramels gluten-free?
Yes, naturally-just check your vanilla and butter labels.

Salted Caramels
Ingredients
Method
- Line an 8×8-inch pan with parchment paper and lightly grease.
- Heat sugar in a heavy saucepan over medium heat until melted and amber in color.
- Carefully add butter and stir until fully melted.
- Slowly pour in warm cream, stirring constantly until smooth.
- Cook the mixture until it reaches 245°F (firm-ball stage) on a candy thermometer.
- Remove from heat and stir in vanilla and fine sea salt.
- Pour caramel into the prepared pan and smooth the top.
- Sprinkle with flaky sea salt and let cool completely.
- Cut into squares and wrap individually.
Notes
- A candy thermometer is essential for proper texture.
- Warm cream prevents the caramel from seizing.
- Do not refrigerate; store wrapped caramels at room temperature.
- Keeps well for up to 2 weeks in an airtight container.