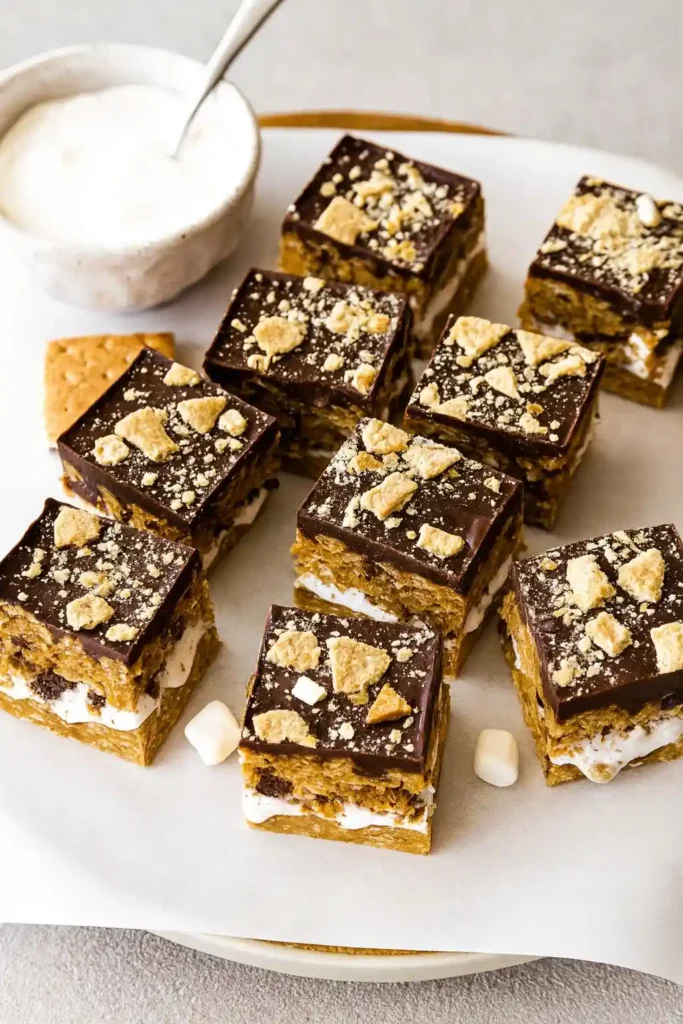
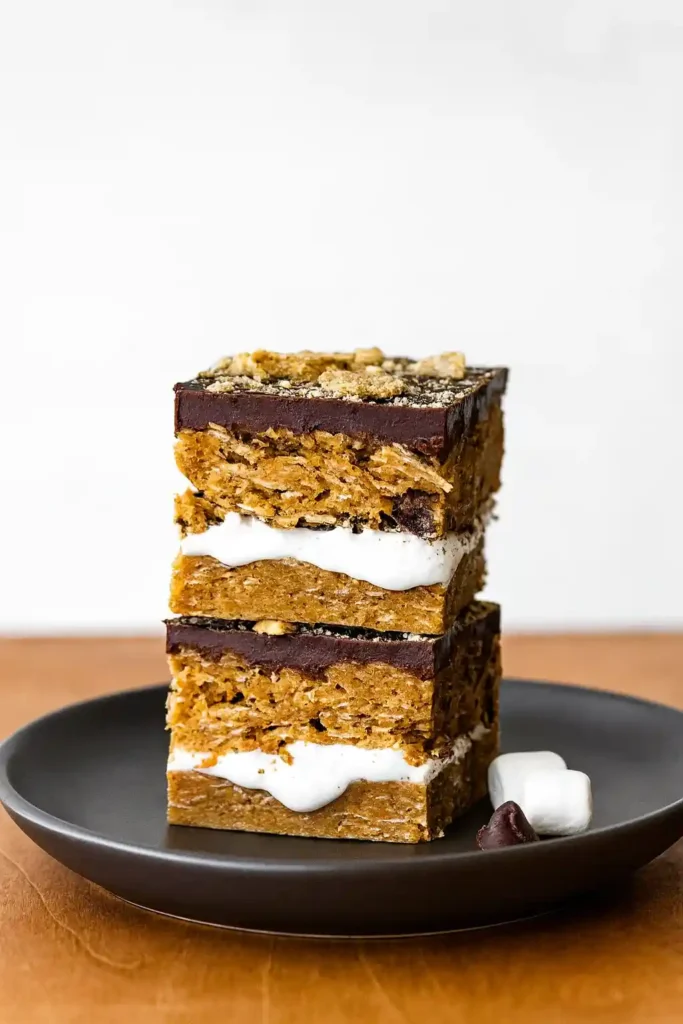
No Bake Peanut Butter S’mores Bars are a delicious twist on the classic campfire treat — no fire or oven required. These bars bring together creamy peanut butter, gooey marshmallows, and rich chocolate, all layered on a crunchy graham cracker base.
They’re perfect for summer gatherings, holidays, or any time you want a quick and indulgent dessert without turning on the oven. If you love easy, layered treats, you might also enjoy our No Bake Almond Joy Bars — they’re just as simple and satisfyingly sweet.
Ingredients You’ll Need for the Recipe
- 2 cups graham cracker crumbs
- ½ cup unsalted butter, melted
- ¾ cup creamy peanut butter, divided
- 2 cups mini marshmallows
- 1 ½ cups chocolate chips (semi-sweet or milk)
- 1 tbsp coconut oil or shortening
- Optional: crushed graham crackers, extra marshmallows, or melted peanut butter for drizzling
For another dessert that combines chocolate and cookie layers beautifully, check out our Peanut Butter Oreo Cookies — they’re chewy, chocolatey, and packed with flavor.
Step-by-Step Preparation Guide
Making these no bake peanut butter s’mores bars is simple and quick:
- Prepare the crust: In a medium bowl, combine graham cracker crumbs, melted butter, and a bit of peanut butter. Mix until well combined and press firmly into a parchment-lined 8×8-inch pan to form an even base.
- Melt the peanut butter and chocolate: In separate bowls, melt peanut butter and chocolate chips (with a little coconut oil) in the microwave or over a double boiler until smooth.
- Layer the marshmallows: Evenly scatter mini marshmallows over the crust. Gently press them down to stick.
- Add peanut butter layer: Pour melted peanut butter over the marshmallows, spreading it gently with a spatula.
- Top with melted chocolate: Drizzle the melted chocolate evenly over the peanut butter layer and smooth it out.
- Decorate: Sprinkle crushed graham crackers or a few extra marshmallows on top for texture and a classic s’mores look.
- Chill: Refrigerate for 1–2 hours, or until the bars are set and firm enough to cut.
Tips for Perfectly Layering the Bars
To get clean layers and that signature s’mores look:
- Press the crust firmly to keep it from crumbling when cutting.
- Use mini marshmallows — they distribute more evenly and melt into the peanut butter layer better.
- Pour peanut butter slowly so it doesn’t dislodge the marshmallows.
- Chill between layers for a few minutes if the peanut butter or chocolate seems too runny.
- Use a warm knife when slicing for smooth, clean cuts.
If you love desserts with clean layers and chewy textures, try our Maple Brown Sugar Cookies — they deliver that warm, sweet balance in every bite.
Creative Variations to Try Out
Once you’ve mastered the basic recipe, there are plenty of ways to get creative:
- Crunchy peanut butter – Adds extra texture to the bars.
- White chocolate topping – Swap dark chocolate for a sweet, creamy twist.
- Nutella drizzle – Adds a hazelnut flavor layer.
- Crushed pretzels – For a salty-sweet contrast.
- Reese’s Pieces or mini peanut butter cups – Press into the top before chilling for a peanut butter overload.
- Add a layer of caramel – Between the marshmallows and peanut butter for a decadent finish.
For another chocolatey, crowd-pleasing dessert, check out our Oreo Brownies — rich, fudgy, and always a hit.
Storing and Serving Your S’mores Bars
These bars are perfect for making ahead:
- Refrigerator: Store in an airtight container for up to 1 week.
- Freezer: Freeze for up to 2 months. Place parchment between layers to prevent sticking. Thaw in the fridge before serving.
- Room temperature: Keep out for a few hours when serving at parties, but avoid hot weather to prevent melting.
Serving tips:
- Cut into small squares for bite-sized treats.
- Pair with iced coffee or hot chocolate for the ultimate s’mores experience.
- Top with a few mini marshmallows and use a kitchen torch to lightly toast them for extra flair.
Nutritional Information at a Glance
Here’s a quick look at the approximate nutrition per serving (based on a 16-bar batch):
| Nutrition (per serving) | Amount |
| Calories | 250 kcal |
| Carbohydrates | 24 g |
| Protein | 5 g |
| Fat | 15 g |
| Saturated Fat | 6 g |
| Sugar | 18 g |
| Fiber | 2 g |
These bars are indulgent, but the peanut butter and graham crackers add a bit of protein and fiber for a balanced sweet treat.
Why These Bars Are a Must-Make
- No oven needed — ideal for summer or quick prep.
- Layered flavors — crunchy, gooey, chocolatey, and nutty in one bite.
- Great for parties — easy to slice and serve.
- Kid-friendly — a fun activity to make with little helpers.
- Customizable — endless variations with toppings and flavors.
They’re the perfect make-ahead dessert, and they hold up beautifully for potlucks, picnics, or family movie nights.
Enjoy Your Delicious Treat!
No Bake Peanut Butter S’mores Bars are everything you love about s’mores — with an extra peanut butter twist and none of the hassle. With their crunchy base, gooey middle, and smooth chocolate topping, they’re guaranteed to disappear fast at any gathering.Pair them with other no-bake favorites like our Best No-Bake Cookie Dough Bites for an irresistible dessert spread that takes minimal effort but delivers maximum flavor.

No Bake Peanut Butter S’mores Bars
Ingredients
Method
- Prepare the crust: In a medium bowl, combine graham cracker crumbs, melted butter, and ¼ cup peanut butter. Stir well, then press firmly into a parchment-lined 8×8-inch pan to form an even crust.
- Layer marshmallows: Evenly scatter the mini marshmallows over the crust and gently press them down.
- Melt peanut butter and chocolate: In separate bowls, melt the remaining peanut butter and the chocolate chips (with coconut oil) in the microwave or over a double boiler until smooth.
- Add peanut butter layer: Pour melted peanut butter over the marshmallows and spread gently with a spatula.
- Add chocolate layer: Pour melted chocolate evenly over the peanut butter layer and smooth out the top.
- Decorate: Sprinkle with crushed graham crackers, extra marshmallows, or a drizzle of melted peanut butter if desired.
- Chill: Refrigerate for 1–2 hours, or until fully set. Slice into squares with a warm knife for clean cuts.
Notes
- Press the crust firmly to prevent it from crumbling when sliced.
- Chill the bars thoroughly before cutting to keep the layers neat.
- Use mini marshmallows for even layering and easy cutting.
- You can swap chocolate types (milk, dark, or white) to suit your taste.
- Store in the refrigerator for up to 1 week or freeze for up to 2 months with parchment between layers.
- Let bars sit at room temperature for 5–10 minutes before serving for the best texture.